Salt Dough Maps- Creative Geography Lesson
A Simple No Bake Salt Dough Recipe for a Fun Geography Lesson
Are you looking for a fun, easy, creative, slightly messy, and hands-on way to learn about maps, land forms, and geography? Salt-Dough Maps are such a fun way to add the fun wow factor to your homeschooling lessons.
What kid doesn’t enjoy learning while creating a piece of hands-on art?
Here you will find directions on how to make salt dough, make a relief map, and other fun uses for the salt dough. While there is a little bit of added prep, the rewards of your child’s hands-on learning will be worth it.
Caution: Raw flour is safe safe for consumption, make sure that all participants wash their hands after each use.
“This post contains affiliate links, which means I receive a small commission, at no extra cost to you, if you make a purchase using this link. Please see my disclosure for more details.”
How to Use Salt Dough Maps to Make Learning Creative and Fun!
Sure, you can print that map off of the internet and have your kiddos fill in the cities, mountain ranges, lakes, rivers, and other important landmarks… But that may not be the most effective way for your child to truly learn. Often, taking the extra time to prep for an engaging learning opportunity will reap the reward of long term learning.
Our brains are designed to connect with the physical world through hands-on interaction.
A Creative Learner
Hands on learning is so effective because children learn by doing. Creating a map using salt dough is not only fun, but will encourage your child to truly learn and have fun at the same time.
What is a Salt Dough Map?
A salt dough map is a three-dimensional map that allows children to create mountain ranges, hills, lakes, rivers, oceans, and so on. It is more useful for a child to see that maps represent different topographical features that are not easily seen with a paper map. The main components are salt, flour and water. Salt dough is super easy to work with and is fun to play around with.

These 3D maps are super effective for younger children that are just starting to work with maps. It helps them to see and understand the different characteristics of regions on a map. But don’t necessarily leave out your older ones. They can benefit from this hands-on lesson as well.
How Do You Make a Salt Dough Map?
Salt dough maps are super simple. They require a minimal amount of prep. They can, however, be quite messy. The mess, however, is well worth it!
Prior to beginning a salt dough maps, I would suggest spending a little time researching what relief maps are. We decided to research topography maps first, using the colors that are typically used for altitude differentiation.
There are so many amazing map books that you can purchase or check out from the library. Having a couple for reference is helpful.
We were learning about the Lewis and Clark Expedition in our history studies. This was a great opportunity to incorporate geography in a way that catered to my children’s kinesthetic and artistic learning styles.
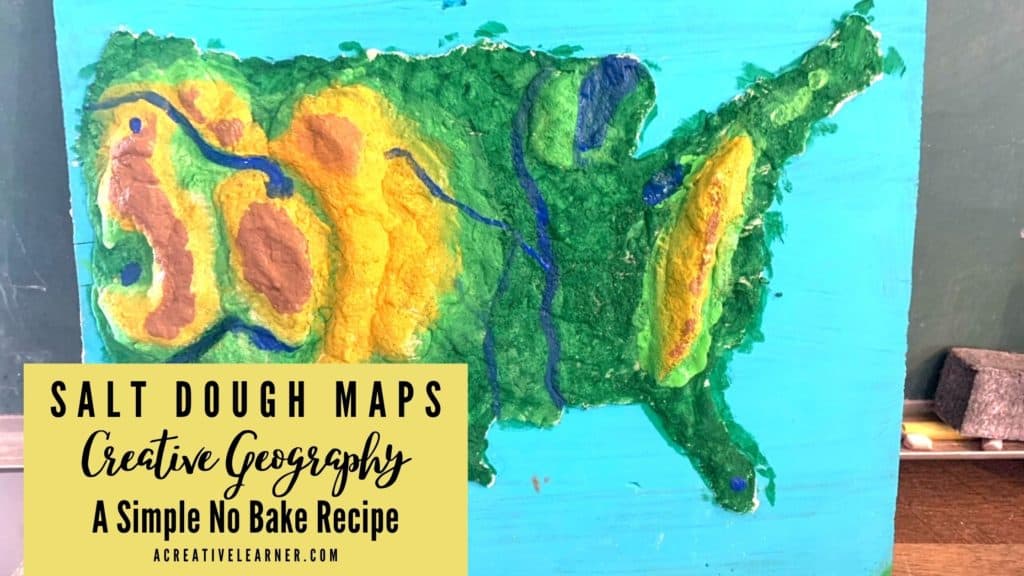
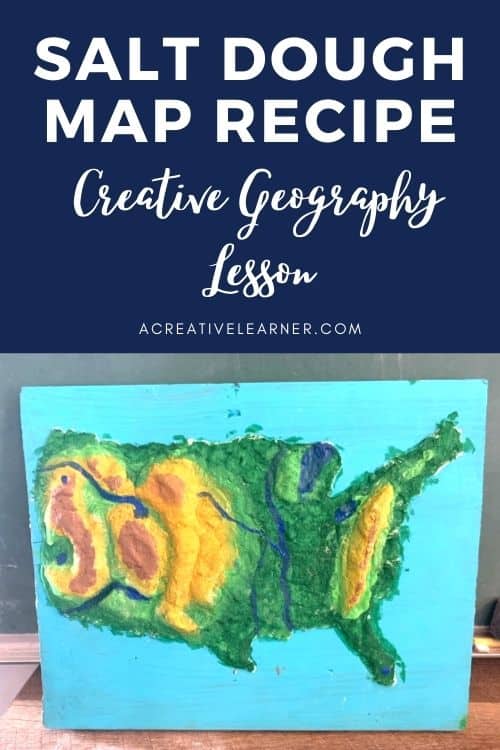
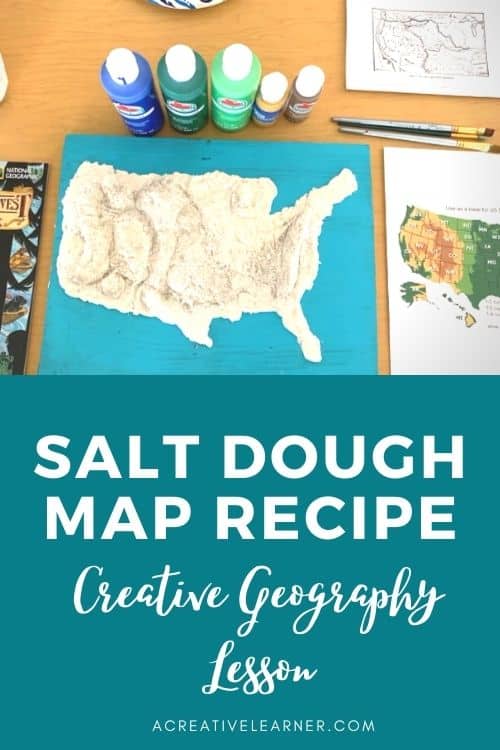
Here are simple directions to create your own salt-dough map for any geographical region. We chose to create a map of the United States of America because we were studying the landscape in which pioneers traveled west. My children were learning about the different regions that were traveled through such as Mountain ranges, plains, rivers, lakes, etc.
We copied the colors of altitude from a geology website. You can even use a geography map book to use as an example for which colors to use.

What are the Supplies and Materials Needed to Make a Salt Dough Map?
Salt
flour
water
bowl
stirring utensil
pencil
acrylic paint
paint brushes
wood panel (or you can use thick cardboard)
paper to cover surface of table


What is the Recipe for Salt Dough?
In a bowl, mix:
2 cups all purpose flour (cheap is fine)
1 cup salt
1 cup water
1 TBSP cream of tartar (ONLY for Play dough- not necessary for the salt dough maps)
Stir with a spoon, until it is too difficult, then use your hands. The goal is to mix until it has the consistency of play dough. Sometimes you may need to add more water or more flour. Find a consistency you like.
****Remember to always wash your hands after handling raw flour!!!****
Directions for Salt dough map
- Sketch out the region on your panel of wood with a pencil
- Cover your work area with newspaper or messy tablecloth
- Make your salt dough (don’t eat it, its disgusting :-)- see recipe above.
- using small amounts, begin to add the salt dough to your wood panel
- add layers of salt dough to the regions that are mountains
- using a pencil or other tool, etch out lakes, rivers, and other low areas.
- smooth your map gently with fingertips
- once you and your children are happy with your salt dough map, allow 1-2 days for the dough to dry completely.
- paint your dry map according to a key that you create (or copy)
How Long Does it Take for a Salt Dough Map to Dry?
I live in a dry climate (southern California). We did our map during late spring, and it took 1 day to dry. It may take longer if you live in a humid climate. You know it is dry if it is all the same light color and it will feel dry as well. Make sure that there is no more moisture in the salt dough.
What Paint do You Use for Salt Dough Maps?
Acrylic paint is the best paint to use for your salt dough maps. Make sure your Salt dough map is dry prior to painting as Acrylic paint is vibrant and dries rather quickly. It is best if you use a variety of brushes for your map so that you can add in details such as rivers and lakes. When we finished our United States of America salt dough map, it was so beautiful that I started using it as a decoration.
Practical Tips Before You Get Started 🙂
If you are working with super young kiddos, give them some exploration time with the dough before you begin constructing the map. Little ones love to experiment with new things, so you will notice they will be easily distracted observing and manipulating their fresh salt-dough. Let your young kids know that have a set time to play around with the dough before the lesson begins. They will be more ready to learn once they have explored and played with the salt dough.
“Tell me and I forget. Teach me and I remember. Involve me and I learn.”
Benjamin Franklin
Now, if you are like me, stepping in to help (or take over) for your child is a real temptation. However, it is important to not take over this project for your kids. During the map creating project, try to let your child create and take ownership of this project, helping as little as possible.
What are some more uses for Salt Dough? Taking Salt Dough to the Next Level
The Uses are really endless! There are so many things you can make with salt dough! If you give salt dough as an option to your children to extend their learning they will take it. (Mine children LOVE using salt dough!)
Art
Create replica sculptures from famous artists or old artifacts that you see at the museum.
Geography
Choose any region and create a three-dimensional map. You can even add buildings, roads, parks, etc.
History
Create a bust of a famous person from history or recreate one of the seven wonders of the world.
Science
Create a habitat, mold an organ from the human body, make a model of a cell and label it.
Create Fossils and bones, and recreate an archaeology dig.
FREE CREATIVE TIME (My children’s favorite)
Math
Make manipulatives to practice addition, subtraction, and other math properties. The recipe is a good lesson in measurement.
Make some Salt Dough and simply let your children play.
You can make your own play dough. BUT, you will need to add 2 more special ingredients… Cream of Tartar and food coloring.
What is the Purpose of Cream of Tartar in Salt Dough?
The ingredient Cream of Tartar makes the dough super soft and easy to work with. If you place your dough in a zip lock bag, it will keep for quite a while. The salt is a preservative, so it could last for months.
Hands-On Learning Benefits
There are many benefits of hands-on learning! When children interact with the world they take ownership of their learning. Chances are they are having fun as well when they are learning in a hands-on way. This emotional connection to learning is another important aspect of their education.